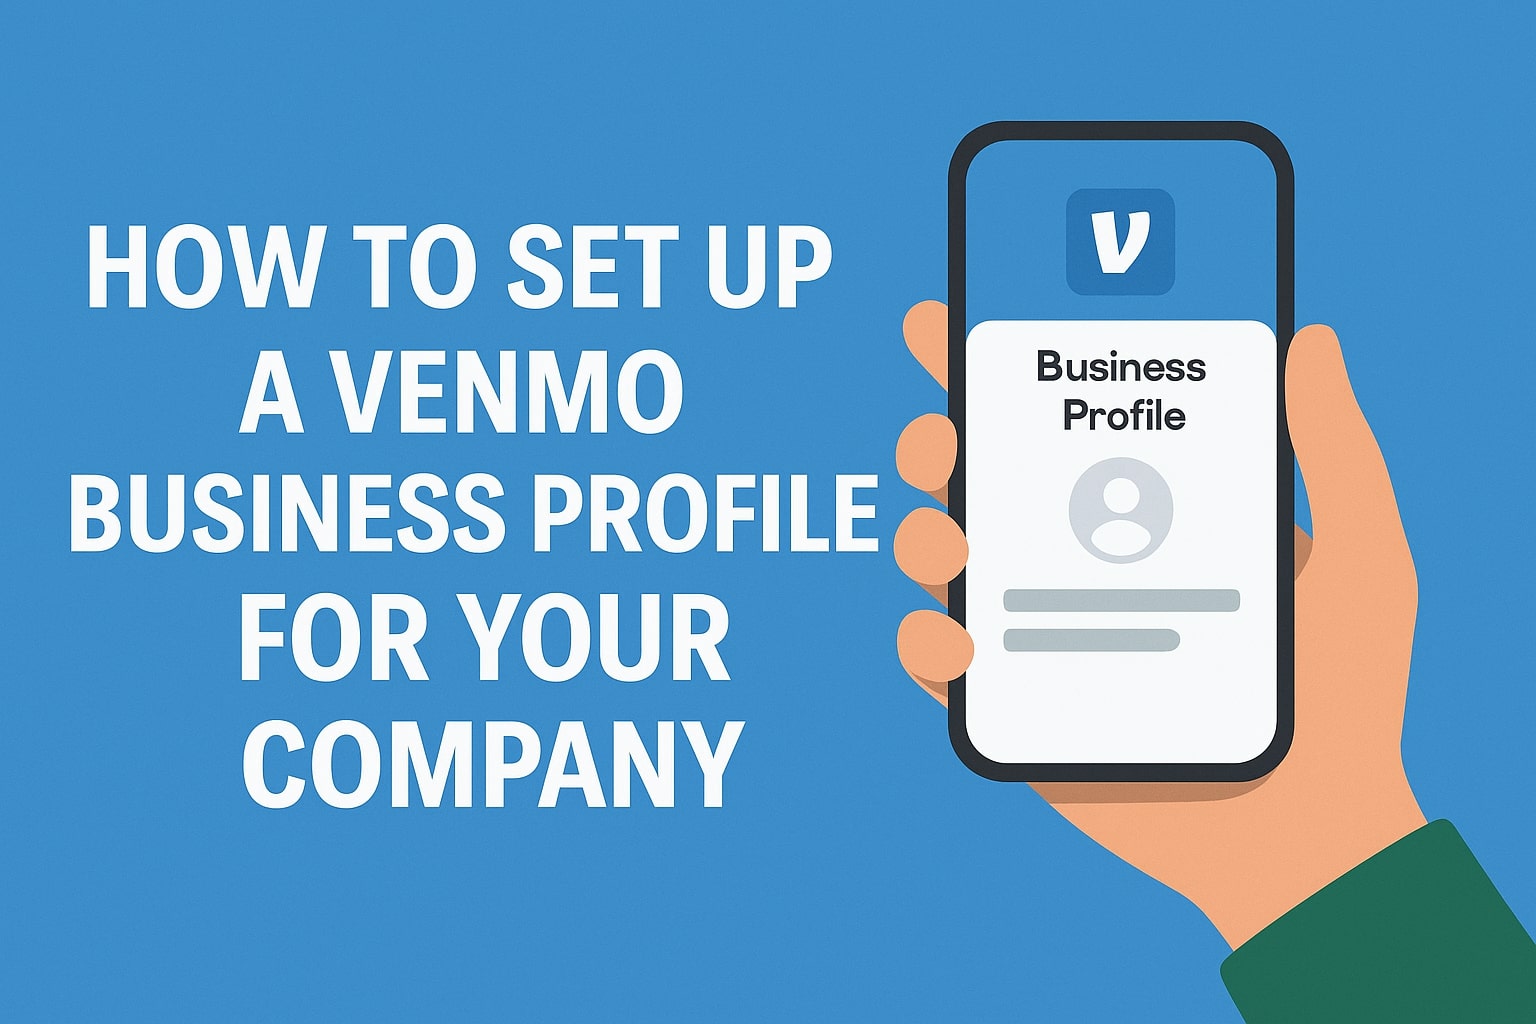
Digital payment apps like Venmo have become a staple for person-to-person transactions, and now businesses are joining in. Venmo’s Business Profile feature allows companies – from sole proprietors and clubs to LLCs and corporations – to accept customer payments through Venmo under a dedicated business account.
In this comprehensive guide, we’ll explain how to set up a Venmo Business Profile for your company, step by step. We’ll also cover the benefits, requirements, and comparisons with alternatives (such as PayPal Business and Zelle for Business) so you can determine if Venmo is the right fit for your business needs. Let’s dive in.
What Is a Venmo Business Profile?
A Venmo business profile is essentially a separate profile tied to your personal Venmo account that’s designed for commerce. It enables you to accept payments for goods and services under your business name, rather than your personal Venmo username. This feature was introduced to cater to small businesses, entrepreneurs, and organizations looking for a simple way to get paid via Venmo’s popular platform.
Key characteristics of Venmo Business Profiles:
- Linked to Personal Account: You must have a personal Venmo account to create a business profile (they share the same login). The business profile lives under your account but has its own username and branding. You can seamlessly switch between personal and business profiles in the Venmo app.
- For a Variety of Business Types: Venmo business profiles can be used by individuals/sole proprietors, partnerships, clubs, non-profits, or registered companies. Venmo explicitly supports a wide range of entities – from one-person operations to associations and corporations.
- Accept Payments for Goods and Services: Unlike personal Venmo which is for peer-to-peer transfers, a business profile is meant for commercial transactions. Customers can pay your business via the Venmo app just as they would pay a friend, but those payments are flagged as commerce (making them subject to seller fees and purchase protection rules).
- Subject to Fees and Taxes: Payments received via a business profile incur processing fees (explained later) and count toward tax reporting thresholds. Venmo will issue a Form 1099-K for business profiles that meet IRS reporting criteria (currently as low as $600 per year in payments).
Benefits of Using a Venmo Business Profile
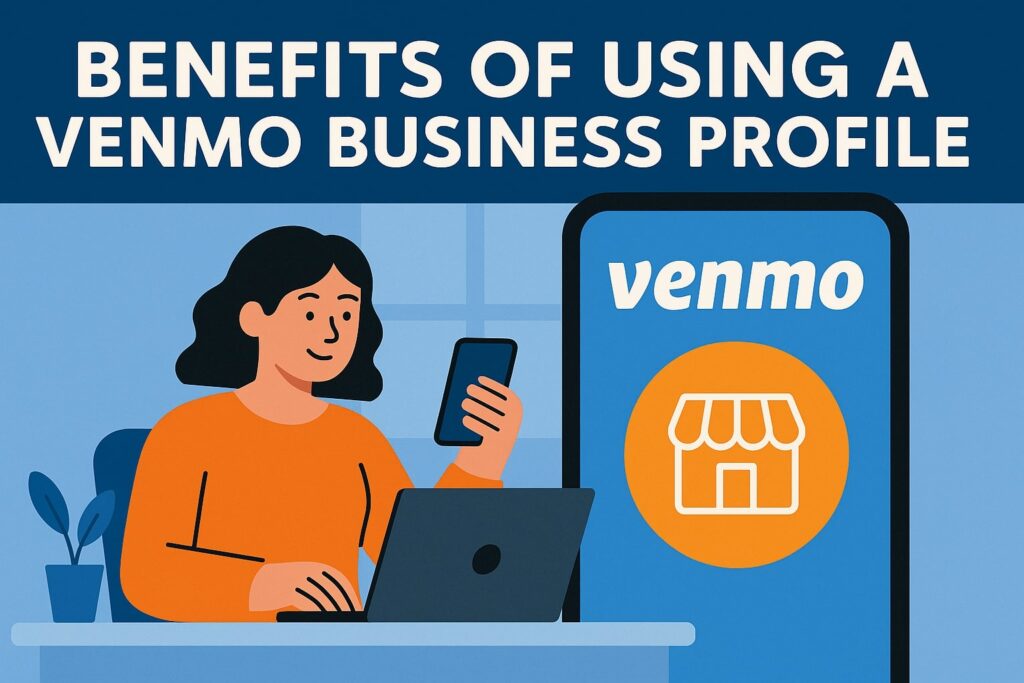
Venmo for Business comes with several advantages that cater to small and medium-sized businesses looking for convenient payment options:
Venmo’s app highlights that business profiles let you “stand out, build trust, and get paid,” touting quick setup, low fees (1.9% + $0.10), ability to accept cards and digital wallets, and purchase protection on eligible sales.
- Easy Setup and No Monthly Fees: Setting up a Venmo Business Profile is quick and doesn’t require formal approval or credit checks. There are no sign-up or monthly maintenance fees – you only pay a small fee per transaction when you get paid.
- Low Transaction Fees: Venmo’s processing fee for business profile payments is only 1.9% + $0.10 of the transaction – lower than many traditional merchant services. (For comparison, PayPal’s standard fee is around 2.99% + $0.49.) This makes Venmo cost-effective for businesses with tight margins.
- Built-In Marketing via Social Feed: Venmo has a social-media-like feed where transactions (minus amounts) can be shared. Business profiles benefit from increased visibility in this feed, potentially reaching the friends of your customers and generating word-of-mouth referrals. Essentially, when a customer buys from you and shares it on Venmo, it’s free advertising to Venmo’s ~83 million users.
- Younger Customer Reach: Venmo is especially popular among Millennials and Gen Z. If your customer base skews younger (teens to 30s), they’re likely to prefer paying with Venmo. In fact, 68% of Venmo users are under 40. By offering Venmo, you cater to these demographics’ habits and expectations.
- Multiple Payment Options for Customers: Through Venmo, customers can pay you using their Venmo balance, linked bank account, or even a credit/debit card (Venmo charges the sender a 3% fee for credit card use). With Venmo’s new “Tap to Pay” feature, you can even accept contactless cards, Apple Pay, and Google Pay directly via your phone as a Venmo business – meaning customers who don’t use Venmo can still pay you in person.
- QR Codes for In-Person Payments: Every business profile comes with a unique QR code. Customers can simply scan it with their Venmo app to find and pay your business instantly. Venmo will even mail you a free QR code kit (tabletop display, stickers, etc.) to help you promote and use this feature in-store.
- Tipping and Partial Payments: Venmo Business Profiles allow tipping by customers. You can toggle on a tipping prompt, enabling satisfied customers to easily add a tip during payment. You can also issue refunds (full or partial) directly through the app if needed.
- Integrated Records and Transfers: All transactions on your business profile are logged in-app, making it simple to track sales. Funds from sales land in your Venmo balance, which you can transfer to your bank. Standard bank transfers are free and typically take 1–3 days; instant transfers are available for a 1.75% fee (capped at $25). Venmo also provides formal statements and will send required tax documents (like the 1099-K) automatically when thresholds are met.
- Trust and Purchase Protection: Venmo (owned by PayPal) has built-in security and encryption. For customers, eligible purchases from business profiles may be covered by Venmo’s Purchase Protection program, giving buyers confidence to transact. While Venmo’s social aspect is informal, many users appreciate the transparency and trust signals (e.g. seeing that a business has a verified profile and transaction history).
In short, a Venmo Business Profile offers an easy, low-cost way to accept mobile payments, especially useful for small and new businesses seeking to tap into Venmo’s large user base and social commerce features.
Requirements and Eligibility
Before you can set up a Venmo Business Profile, make sure you meet the basic requirements:
- Residence and Geographic Limitations: Venmo is currently available only in the United States for both merchants and customers. You (and your customers) must be U.S. residents with a U.S. mobile number and bank to use Venmo. International payments or use outside the U.S. are not supported on Venmo.
- Personal Venmo Account: You must have a personal Venmo account to create a linked business profile. If you’re new to Venmo, you’ll create a personal account first (during sign-up you can actually set up both personal and business profiles in one flow). Business profiles do not have separate login credentials – you always log in via your personal account and then switch into the business profile.
- One Business Profile Per User: Venmo allows only one business profile per personal account. You cannot create multiple business profiles with one Venmo login, so if you operate multiple businesses, this could be a limitation.
- Business Information Needed: You should legitimately represent a business (even if it’s just you as a sole proprietor or a hobby side-business). Venmo will ask for details to verify your business:
- Business type: Is it an “Individual” (unregistered sole proprietor using your SSN) or a “Registered” business (LLC, corporation, partnership, or non-profit with its own EIN)? You’ll select one during setup. (If you have an EIN, bring that; if not, you’ll use your Social Security Number for tax purposes.)
- Legal name and contact: Your legal first and last name, and an email address and phone number for the account (the phone will be verified via SMS code).
- Business name and username: The display name customers will see (e.g. “Acme Bakery”) and a unique Venmo handle (e.g. @AcmeBakery) for your business. (The handle must be distinct from your personal username.)
- Business description and category: A short description (up to 155 characters) of what your business does, and a category selection from Venmo’s list (e.g. “Retail > Clothing” or “Food & Beverage > Coffee Shop”).
- Business address: You’ll provide a business mailing address for Venmo’s records (this could be your personal address if you’re unregistered), as well as optionally a public address (city/state or full address) that can appear on your profile for customers. (For registered businesses, use the official registered address).
- Identification (SSN/EIN) and verification docs: If you’re a sole proprietor, be prepared to provide your Social Security Number (SSN) or Individual Tax ID (ITIN). If a registered business, your Employer Identification Number (EIN) is used. Venmo will attempt to auto-verify the business information (name, address, EIN) against public records. If they cannot, they may request additional documentation (e.g. EIN confirmation letter, business registration documents) to confirm your identity.
- Banking information: While not strictly required to set up the profile, you’ll likely want to link a bank account or debit card to withdraw your funds. This is done through the Venmo “Wallet” section. (Remember, standard bank transfers are free; instant transfers to a debit card incur 1.75% fee.)
- Profile image and gallery: You should have a business logo or photo ready for your profile picture, and optionally a cover photo or product images. Venmo lets some industries add an image gallery to showcase products/services. Having a recognizable profile photo helps customers trust that they’re paying the right business.
- Business type: Is it an “Individual” (unregistered sole proprietor using your SSN) or a “Registered” business (LLC, corporation, partnership, or non-profit with its own EIN)? You’ll select one during setup. (If you have an EIN, bring that; if not, you’ll use your Social Security Number for tax purposes.)
- Device: Venmo business profiles are managed via the Venmo mobile app (iOS or Android). While you can perform the initial sign-up on the web, most features (like switching profiles, receiving payments, etc.) require the app. Ensure your smartphone is updated with the Venmo app.
Checklist: Items You’ll Need to Set Up a Venmo Business Profile (for quick reference):
- A personal Venmo account (username/password or the ability to create one during sign-up).
- Business identification info: EIN (if incorporated) or SSN/ITIN (if sole proprietor).
- Business name (display name) and a unique Venmo username for your business.
- A short business description and selection of your business category.
- Business address and contact: mailing address, customer-facing address (optional), business phone number, email, website and social links (optional).
- A profile picture or logo (and optional cover photo) that represents your brand.
Having these details on hand will make the setup process smoother.
Step-by-Step: How to Set Up a Venmo Business Profile
Setting up your Venmo Business Profile is straightforward. Follow these steps to create your profile and start accepting payments:
1. Create or Log In to Your Personal Venmo Account
If you already use Venmo personally, start by logging into the Venmo app on your phone. If you’re new to Venmo, download the app (from the App Store or Google Play) and sign up for a personal account first.
- Existing Venmo Users: Open the Venmo app and go to the “Me” tab (profile icon). Tap your name or username at the top to open the profile selector, then tap “+ Create Business Profile.” You can also find Create Business Profile in the Settings menu (gear icon). Selecting this will begin the setup flow.
- New Venmo Users: Open the app and choose the Business option when prompted to select account type, then tap Sign Up. Venmo will guide you through creating a personal account and a business profile in one process.
You’ll enter your mobile phone number, verify it with a code, then provide your name, email, and create a password. Agree to the terms to create your personal Venmo account. (If you prefer, you can also sign up on the web at venmo.com – after creating a personal account, there will be an option to “Create a business profile” from your account menu.)
Tip: If you’re a new user not ready to set up the business profile immediately, you can skip it during sign-up and create it later. The option to add a business profile will always be available in your app’s settings once you have a personal account.
2. Choose Your Business Type (Individual vs. Registered)
Once you initiate the business profile setup, Venmo will ask: “What type of business is this for?” You have two choices:
- Individual Business: Choose this if your business isn’t formally registered (no LLC/corporation) or if you operate as a sole proprietor/independent contractor. This option means you’ll be identified by your personal details (the owner’s name and SSN) for tax purposes.
- Registered Business: Choose this if your business is an LLC, corporation, partnership, or non-profit that has its own legal identity and EIN. You’ll need to provide the legal business name and EIN so Venmo can tie the profile to the registered entity.
Select the appropriate category and proceed. Venmo might show a short explanation of each to help you decide (e.g. “Your business isn’t registered, and you file taxes with your SSN” vs “You have an EIN and file separately”).
3. Enter Business Details and Customize Profile
Next, you will enter the information that will define your Venmo Business Profile:
- Business Name: This is the display name that customers will see for your business. It can include spaces and capitalization (e.g. “Jenny’s Bakery”). Many businesses use their brand name or DBA here. Enter the name and double-check spelling, since it will appear on receipts and in the Venmo feed.
- Venmo Username: Create a unique username/handle for your business profile, beginning with @. This is how people can search for you. If possible, make it something close to your business name (e.g. @JennysBakery) for consistency. Venmo will indicate if the username is available. (Your personal username remains unchanged; the business gets its own @ handle.)
- Profile Picture & Cover Photo: Upload a profile image for your business. Ideally, use your company logo or a clear photo that represents your brand – something consistent with your other marketing materials. Venmo might also allow a cover/background image; if so, you can choose a banner that showcases your products or vibe. These visuals help your profile look professional and recognizable.
- Short Bio/Description: Write a brief description of your business (up to 155 characters) describing what you do or sell. Keep it succinct and clear, as this will show on your profile. For example: “Artisan bakery specializing in custom cakes and pastries.”
- Business Category: Select the category that best fits your business from the dropdown options. Venmo provides categories (e.g. Food & Drink, Retail, Professional Services, etc.) and even has specific ones for clubs/associations. Pick the closest match; this helps for discoverability and clarity on what you offer.
After entering these, Venmo may show you a preview of how your profile will look to customers, including the name, @username, bio, and photos. Review it to make sure everything appears correctly and is spelled right.
Example from Venmo’s setup: adding a business display name and username. Make sure to use your brand’s name and a simple handle. Venmo will indicate if a username is already taken.
4. Provide Contact Info and Address
Now fill in the business contact details:
- Business Address: Enter your business’s mailing address. If you selected Registered business, use the official registered address. If Individual, it could be your personal or business location. Venmo may also ask for an address that will be visible to customers – you can choose to show either your full address or just city and state, or hide it if you prefer privacy. For many home-based businesses, showing just city/state is common.
- Phone Number: Provide a contact phone number for the business. This might be used in your profile or for Venmo’s verification. (Customers won’t necessarily see this unless you add it to public info, but Venmo keeps it on file.)
- Email: Your Venmo login email is already on file (from your personal account setup), but you might be able to list a public contact email or website. Venmo business profiles can include links to your website or social media pages for customer reference – take advantage of that by adding your website URL or Instagram handle in the profile settings (either now or after setup).
5. Publish Your Venmo Business Profile
After all required fields are entered, it’s time to make your profile live. Venmo will give you the option to Publish (or “Create”) your business profile. Tap that button – congratulations, your Venmo Business Profile is now created!
Once published, your profile is active and you can immediately begin receiving payments. At this point, Venmo may label your profile as “unverified” until certain info is confirmed (more on verification below), but you’re still able to accept payments right away.
A few things happen upon publishing:
- Venmo generates a QR code for your business profile, which you can find under the “Share” or QR code menu. This code is unique to your business; you can save it or even order a kit with printouts.
- Your business profile becomes searchable in Venmo’s directory. By default, new business profiles are set to be discoverable in search results. (Users can specifically filter search to show business profiles, making it easier to find companies.) Ensure the “Market your business profile” option is enabled in settings if you want customers to find you by name.
- Venmo may send a confirmation email or notification summarizing your new business profile details.
6. Verify Your Identity (if prompted)
Venmo will attempt to verify the information you provided (identity and business details) using its automated systems. Often, if you entered everything accurately, verification is automatic and you won’t need to do anything extra.
However, if Venmo cannot auto-verify something (for example, it can’t match your EIN to your business name, or needs to confirm your identity), they will reach out with instructions. You might be asked to upload documents such as: government ID, your EIN confirmation letter from the IRS, business license, or other proof of ownership.
During this time, note the following limitations and points:
- You can still use the business profile and receive payments even if verification is pending. The main impact is on transferring funds out: unverified profiles are initially capped at transferring $999.99 per week to your bank. Once you complete verification, higher limits apply.
- Verified business profiles can transfer out up to $19,999.99 per week to their bank (in up to $5,000 increments per transfer). There may also be a maximum of around $25,000 per week in Venmo payments you can receive, based on some user reports, but most small businesses won’t hit this cap regularly.
- There is a per-transaction limit of $999.99 for payments to businesses through Venmo (customers can’t send more than that in one go via Venmo app). Larger amounts would need to be split or use another service.
- You will use your personal Venmo login credentials to access both your personal and business profiles. There isn’t a separate password for the business. Keep your login secure and enable two-factor authentication to protect both profiles.
- If you ever need to edit your business profile info (name, photo, etc.), you can do so in the Venmo app under the business profile settings. Changes may be subject to review by Venmo.
That’s it – you have successfully set up a Venmo Business Profile! Next, we’ll cover how to use it and manage payments, as well as important considerations.
Managing and Using Your Venmo Business Profile
After setup, using your Venmo business profile is simple. Here are key points on day-to-day usage:
- Switching Profiles: In the Venmo app, you can toggle between your personal and business profile using the profile switcher (tap your name at top of the Me tab). Always double-check which profile you are on before sending or requesting money, to avoid mixing personal and business transactions.
- Accepting Payments: To get paid, you can request payments from customers or have them pay you spontaneously. Customers can find your business profile by:
- Scanning your QR code in person (e.g. you can display it at checkout or on an invoice).
- Searching for your business name or @username in the Venmo app. (Make sure “Show in search results” is enabled as mentioned.)
- Tapping a Venmo button on your website/app if you integrated Venmo for online checkout (this uses PayPal’s infrastructure – separate from the P2P app, but it will direct payments to your business). For online integration, you’ll typically use PayPal Developer tools to add a Venmo payment option at checkout.
- Scanning your QR code in person (e.g. you can display it at checkout or on an invoice).
- In-Person Sales: Venmo is great for in-person, contactless payments. For example, at a farmer’s market or boutique, you can display your QR code. The customer opens their Venmo app, taps “Scan,” and your business profile comes up for payment.
If you’ve enabled Venmo’s Tap to Pay on your phone, you can also accept a customer’s physical credit card or phone wallet by just having them tap your device (no extra hardware needed). This expands your payment options (customers without Venmo can pay via their card/Apple Pay/Google Pay through your Venmo app). - Sending Payments or Refunds: Business profiles aren’t only for receiving money – you can also send payments from the business profile to pay others on Venmo. For instance, you might pay a vendor or issue a customer a refund. To do so, switch to the business profile and use the Pay/Request button as usual. (Note: You currently can only send payments from the business profile via the mobile app, not on the Venmo website.)
- Handling Fees: When a customer pays your business profile, Venmo will automatically deduct the business transaction fee from the amount. You do not need to separately charge it. For example, if a customer sends you $100, Venmo will take $1.90 + $0.10 and you’ll net $98.00, which appears in your balance. Venmo’s transaction history will show the fee for your reference.
- Transferring Funds to Bank: Monitor your Venmo balance in the app. You can initiate a transfer to your linked bank account anytime. Standard transfers (1–3 biz days) are free; if you need funds immediately, use Instant Transfer for a 1.75% fee (minimum $0.25, up to $25 max). Plan your cash flow around these options – many businesses do daily or weekly transfers of their Venmo balance.
- Bookkeeping Considerations: All money from both your personal and business profile resides in one Venmo balance (since it’s one account). It means funds are not segregated by profile internally. So you should keep good records of which transactions are business-related (Venmo does label them, and you can download statements for just the business profile).
Still, when that money hits your bank, it’s coming from one source. It’s wise to transfer business revenues to a dedicated business bank account regularly for accounting and tax purposes. - Privacy and Professionalism: Be aware that Venmo’s default social settings might make transactions visible on the feed. You can set your business transactions to private or friends-only if you prefer confidentiality. Some users feel Venmo has a casual vibe (with emojis and public feeds) that’s “less professional” than traditional payments.
Depending on your brand image, you can decide how to handle the social aspect – you may encourage customers to share (for viral marketing), or you may keep transactions private. Venmo does let you control these settings per transaction or profile-wide. - Customer Experience: From the customer’s perspective, paying a business on Venmo is quite seamless. They might see an indication that the profile is a business and that eligible purchases are covered by Purchase Protection (giving them confidence).
Customers can also use Venmo’s own Venmo Debit Card or Credit Card to pay you, or Venmo app balance, etc., so they have flexibility. If a customer doesn’t use Venmo, you can always accept other forms or consider generating a Venmo payment link to email/text them (which will prompt them to sign up and pay). - Support and Account Management: If you run into any issues (disputes, technical problems, etc.), Venmo’s support is reachable via in-app chat or email, and phone support during business hours. There’s also a dedicated Venmo Business Support email for complex issues.
Keep in mind that, unlike PayPal, Venmo currently does not offer multiple user access – only you (the account holder) can manage the business profile. So you won’t be able to officially add an employee or accountant to help manage the Venmo account.
Fees and Costs for Venmo Business Profiles
One of Venmo’s biggest attractions for businesses is its simple and relatively low-cost fee structure. Here’s a breakdown of the fees you should know about:
- Transaction Fee (Standard Venmo Payment): 1.9% + $0.10 per payment you receive on your business profile. This applies when customers pay you using their Venmo balance, bank account, or debit card via the Venmo app. For example, a $50 payment incurs a fee of $0.95 + $0.10 = $1.05. Venmo deducts this automatically before the funds hit your balance.
- “Pay with Venmo” Online Checkout Fee: 3.49% + $0.49 per transaction. This higher rate applies if you accept Venmo as a payment method on your website or app via PayPal’s integration (i.e. the customer clicks the Venmo button at an online checkout). It’s essentially the same as PayPal’s online processing fee. Businesses using Venmo QR codes in-store to accept payments from the Venmo app are not charged this higher rate; they pay the standard 1.9% + $0.10.
- Contactless “Tap to Pay” Fee: 2.29% + $0.10 per transaction. This is the fee for in-person payments accepted via Venmo’s Tap to Pay on phone (where the customer taps a physical card or phone wallet to your device). It’s slightly higher than the standard fee since the customer might not be using a Venmo account (e.g. they use Apple Pay or a credit card through your Venmo app).
- Credit Card Sender Fee: 3% (paid by the sender). If a customer chooses to pay you in Venmo using their credit card as the funding source, Venmo charges them 3%. This isn’t a fee you pay, but it’s good to be aware – some customers may avoid that by using their bank or debit instead. As a business, you still just get charged the normal 1.9% + $0.10 on your side.
- Instant Transfer Fee: 1.75% (min $0.25, max $25) for withdrawing your Venmo balance to your bank instantly. If you can wait 1-3 days, standard bank transfers are free. This fee is the same for personal and business accounts.
- Other Fees: Venmo does not charge any monthly fees, setup fees, or account maintenance fees for business profiles. There is also no fee to generate or use the QR code, no fee to send money (if you ever pay from the business profile, aside from credit card funding fee if applicable), and no fee to close your profile. In the rare case of currency conversion (which typically doesn’t apply since Venmo is USD-only), that would fall under PayPal’s rates if using online checkout.
To illustrate the cost advantage: A typical $100 sale would cost you $2.00 in Venmo fees (1.9+0.10), whereas processing that $100 via PayPal might cost around $3.30, or via Square about $2.60 (2.6% + 10c). Over many transactions, Venmo’s lower fee can save money for small vendors.
Important: Venmo’s fees are subject to change, and any updates to fees will be reflected in Venmo’s User Agreement or fee page. As of now, the above rates are current. Also note the minimum fee per transaction is $0.01 and Venmo won’t charge more than the payment amount (e.g. if someone pays you $1, the 1.9%+10c fee would calculate to $0.119, but Venmo will round up to at least $0.01 fee). Very small transactions (below $1) will effectively see a higher percentage fee due to the $0.10 base.
Overall, Venmo’s fee structure is simple: no pay, no pay – you only incur fees when you make a sale. This predictability is great for budgeting. Just remember to factor that ~2% cost into your pricing or margins.
Limitations and Considerations
While Venmo Business Profiles offer convenience, they aren’t the perfect solution for every scenario. Keep these limitations and considerations in mind:
- U.S. Only Platform: Venmo can’t be used for international transactions. If you have customers or suppliers abroad, you’ll need another payment method (PayPal, Wise, etc.) for those. Venmo also requires users to have U.S. bank accounts and phone numbers, making it impractical for foreign tourists or non-U.S. clients.
- Single-User Access: Only the person who created the business profile (tied to their personal Venmo) can access and manage it. There’s no multi-user or team access feature. This is fine for a one-person business, but if you have business partners or employees who need to handle transactions, you’d have to share login credentials (not recommended). In contrast, PayPal and more robust systems let you create multiple user logins or permissions.
- Personal & Business Funds Not Fully Segregated: As mentioned, Venmo doesn’t separate the balance for business vs personal profiles on the back-end. All funds go into one Venmo account balance. This means you must be diligent in record-keeping to know which transactions (and resulting funds) are business-related. It’s wise to frequently transfer out business funds to a dedicated bank account to avoid confusion.
- Transaction and Transfer Limits: Venmo imposes limits that may not suit high-volume businesses. For example:
- A customer can’t pay more than $7,000 per week to authorized merchants via Venmo (if they are fully verified). So large purchases above that might fail.
- Your business profile can transfer out a maximum of $19,999.99 to your bank per week once verified. If your sales are higher, you’d have to stagger withdrawals over multiple weeks, which could disrupt cash flow.
- There’s also a single payment cap of $999.99 through Venmo’s P2P system. Need to charge someone $5,000? They can’t do one Venmo payment for that (they could send five payments of $1,000, but that’s clunky).
- These limits underscore that Venmo is geared to small transactions and moderate volumes, not huge enterprise payments.
- A customer can’t pay more than $7,000 per week to authorized merchants via Venmo (if they are fully verified). So large purchases above that might fail.
- No Traditional POS or Invoicing Tools: Venmo is a mobile-centric, app-based system. It does not come with a full point-of-sale hardware or software. You can’t swipe cards (no Venmo card reader), print receipts, or manage inventory through Venmo.
If you need a storefront checkout system, Venmo alone isn’t enough – you might integrate it alongside a POS (e.g. some POS systems let you display a Venmo QR code). Similarly, Venmo doesn’t natively support generating invoices or detailed order management. You can request payments with a note, but it’s not the same as an invoice system. - Limited Business Features: Beyond collecting payments, Venmo Business profiles are relatively barebones. There’s no built-in ability to handle sales tax automatically (you have to calculate and add it manually if needed). There’s no customer loyalty program or detailed analytics provided. You also cannot have multiple business profiles (to separate different product lines or locations) – one per user is it.
- Perception and Professionalism: Depending on your customer base, not everyone is familiar or comfortable with paying via Venmo. Older customers (over 35) may not use it widely. Some might perceive a Venmo payment as less formal – since traditionally it’s used for casual payments. While many legitimate businesses do use Venmo, consider having an alternative for customers who prefer a classic credit card transaction.
- No Buyer/Seller Dispute Resolution like PayPal: Venmo’s Purchase Protection for buyers is limited to certain eligible goods/services, but Venmo does not offer robust seller protection comparable to PayPal’s. If a customer files a chargeback through their bank or claims an unauthorized transaction, you as the seller might have limited recourse through Venmo.
Venmo’s support can help mediate issues, but it isn’t as established a process as PayPal’s dispute system. Also, Zelle has no purchase protection at all (treated as cash), so Venmo is better than Zelle in that regard, but still not as secure for sellers as credit card merchant accounts. - Bank Enrollment for Zelle vs. Venmo’s Openness: (Related to alternatives) Venmo can accept payments from any customer with a Venmo account – which is a lot of people. Zelle, one alternative, requires both parties to have bank accounts that use Zelle, which can limit who can pay you. We’ll compare more in the next section.
Venmo Business vs. PayPal vs. Zelle (Comparisons)
It’s important to consider how Venmo for Business stacks up against other payment options you might use. Two common ones are PayPal Business (including PayPal’s merchant services) and Zelle for Business. Here’s a quick comparison:
| Aspect | Venmo Business Profile | PayPal Business | Zelle for Business |
|---|---|---|---|
| Availability & Reach | USA only (no international payments). Primarily app-based. | Worldwide (200+ countries, 25+ currencies). Web and app accessible. | USA only (domestic bank transfers within participating banks). Mobile banking apps. |
| Transaction Fees | 1.9% + $0.10 per transaction in-app. No monthly fee. (3.49% + $0.49 for online checkout via PayPal integration). | Varies by method: ~2.99%–3.49% + $0.30–$0.49 on standard transactions. (+1.5% cross-border fee for international sales). No monthly fee for basic; some advanced services cost extra. | No fees charged by Zelle itself for standard payments. (Banks typically don’t charge for Zelle transfers.) |
| Payment Methods Supported | Customers pay via Venmo app (using balance, bank, or card). Also accepts contactless card payments and digital wallets (Apple/Google Pay) through Tap to Pay on phone. | Customers can pay with PayPal balance, bank, credit/debit cards, Venmo, and even PayPal’s BNPL (Pay in 4/Pay Later). Supports invoicing, subscriptions, and more. | Customers send money directly from their bank account to yours via linked email/phone. Bank-to-bank transfers only – no credit card or wallet payments. |
| Key Features | Simple P2P-style payments, social feed for marketing, tipping enabled, QR code payments. Mobile-only management. Great for on-the-go and micro-businesses. | Full-service merchant platform: shopping cart integration, invoicing, subscriptions, charity tools, multi-user access, point-of-sale hardware (PayPal Zettle). Strong buyer/seller protection. | Integrated into banking apps – money goes straight to bank. Instant transfers to bank (usually within minutes). No social features or additional tools – purely payment transfer. |
| Limitations | Only one user (owner) can manage; funds not auto-deposited (must cash out); weekly caps (~$20k out); not ideal for high-volume or older customer base. | Higher fees (especially for small transactions); complex fee structure; account holds/limits can occur with risk checks. However, no fixed transfer caps like Venmo, and can handle large volumes. | Both parties need a Zelle-supported bank account; no built-in protection for purchases (transactions are final); not designed for retail (no integration with e-commerce or POS). But no fees is a plus. |
Venmo vs PayPal: Venmo is actually owned by PayPal, but the two serve different use cases. Venmo Business shines for small, casual payments and tapping into Venmo’s social network. It has lower fees for in-person payments and appeals to those who find PayPal too cumbersome. However, Venmo is limited to the U.S. and doesn’t support things like direct international sales, multi-currency, or multi-user management.
PayPal Business, on the other hand, is a heavyweight: it’s available globally, lets you accept a wide array of payment methods (including credit cards directly, PayPal credit, etc.), and provides a suite of business tools from invoicing to a physical card reader (PayPal’s Zettle device). The trade-off is cost – PayPal’s fees are higher on most transactions, and its fee structure can be more complex.
For a small domestic business, Venmo’s simplicity and low fees might be preferable. But if you need to scale up, reach international customers, or require robust features (and can handle the higher fees), PayPal is likely the better choice.
Venmo vs Zelle: Both Venmo and Zelle facilitate quick bank-linked payments in the U.S., but they differ greatly in approach. Zelle is essentially a bank-to-bank transfer service integrated into many banking apps. Its advantage is speed and zero fees – payments move directly into your bank, usually within minutes, and neither party pays a fee.
This makes Zelle attractive for businesses that want immediate funds and don’t want to sacrifice a cut of each sale. However, Zelle has significant downsides for business use: there’s no protection or recourse if a payment is sent in error or a customer is scammed (it’s like cash), and both you and the customer must have a bank that supports Zelle.
There’s no social discovery or marketing element, and you can’t use Zelle as a checkout option on websites or across different banks easily. Venmo, conversely, is open to any user with the app (regardless of their bank) and offers a more feature-rich experience (profiles, QR codes, etc.).
It does have fees for business transactions and a short wait for standard bank transfers, but it is generally more suited for commerce than Zelle, which is intended for simple payments. As one source puts it, use Zelle if you need to move money directly and for free – for instance, a freelancer or B2B setting where both parties are comfortable with it. Use Venmo if you want to engage with retail customers, especially for smaller purchases or in-person sales where a quick Venmo scan at a popup or market is convenient.
Other Alternatives: Beyond PayPal and Zelle, consider other payment solutions depending on your business:
- Cash App for Business: Similar to Venmo, Cash App allows businesses (Cash for Business accounts) with a simple username ($Cashtag) system. It charges around 2.75% per transaction and deposits to your Cash App balance (withdrawable to bank). It lacks the social feed of Venmo but is popular with certain demographics.
- Apple Pay / Google Pay: These digital wallets can be used for contactless payments. Apple Pay doesn’t charge merchants additional fees on top of card processing fees (it’s just a way to use a card via phone). Google Pay is similar. They’re convenient for tap-to-pay and online checkouts, but typically you’d implement them via a payment processor. Venmo’s new Tap to Pay essentially allows you to accept these wallets directly, which is a bonus for Venmo.
- Square (Block) and Stripe: If you need a full point-of-sale or e-commerce payment processor, solutions like Square (which includes the Square Point of Sale app, card readers, etc.) or Stripe for online payments might be more appropriate. They have higher fees (around 2.6% + 10¢ for in-person with Square, ~2.9% + 30¢ online) and more setup, but offer extensive features (inventory, receipts, integrations). Some small businesses start with Venmo for quick payments and later graduate to Square/Stripe as they grow or need more functionality.
In summary, Venmo Business vs alternatives can be summed up as:
- Venmo: Best for small, domestic, person-to-person style transactions, low fees, easy and social, but limited features.
- PayPal: Best for scaling up or international reach, full merchant services, but higher cost.
- Zelle: Best for fee-free instant bank payments among known parties, but no protection and requires bank participation (good for freelancers or contractors).
- Others: Consider your specific needs (point-of-sale hardware, online sales, etc.) and possibly use Venmo alongside another system.
Frequently Asked Questions (FAQs)
Q1: Do I need a personal account to set up a Venmo Business Profile?
A: Yes. A personal Venmo account is required as the foundation for a business profile. You cannot create a standalone business account on Venmo without a personal login. If you don’t have a personal account yet, you’ll create one during the business profile sign-up process (it’s done in one flow). Your personal and business profiles will be linked, but transactions and public profiles are kept separate. Remember, you’ll log in with your personal account credentials and then switch to the business profile in-app when managing business payments.
Q2: What are the fees for Venmo Business transactions?
A: Venmo charges 1.9% + $0.10 for each payment received into your business profile. This fee is automatically deducted. There are no monthly fees, setup fees, or minimum fees beyond that. If you use Venmo for an online checkout on a website (via PayPal integration), the fee is higher at 3.49% + $0.49.
Other potential fees include a 1.75% charge for instant transfers to your bank (optional), and if a customer pays using a credit card on Venmo, they pay a 3% fee (you still pay only 1.9%+10c). Venmo’s fees are quite transparent and competitive compared to typical credit card processing.
Q3: Is there a limit to how much my business can receive or transfer on Venmo?
A: Venmo imposes some limits:
- Per transaction limit: A single Venmo payment (from one customer to you) is typically capped at $999.99 max. Customers also have weekly send limits (e.g. $7,000/week for verified users to authorized merchants). So very large payments might need to be split or handled outside Venmo.
- Transfers to bank: Initially, until you verify identity, you can transfer out up to $999.99 per week to your bank. After verification, you can transfer up to $19,999.99 per week (but no more than $5,000 in a single transfer) from the business profile to your bank. There is no daily transfer; it’s a rolling weekly limit.
- Total receiving limit: While Venmo hasn’t published a strict weekly receiving cap for business profiles, practical limits exist (some sources mention around $25k/week in payments). The transfer-out limits effectively enforce how much you can liquidate per week. Venmo is designed for small to medium volume. If you anticipate tens of thousands in daily sales, it may not be the right tool.
Q4: How do customers pay for my business with Venmo?
A: Customers must have a Venmo account (unless you’re using the Tap to Pay for cards). They can pay you in a few ways:
- In person: Open the Venmo app, scan your business’s QR code, and complete the payment to your profile. This is the quickest for face-to-face transactions.
- Search in app: They can use the Venmo search to find your business by name or username (especially if you’ve shared your @ handle). Your business profile will show up with a brief description and they can hit “Pay”.
- Online checkout: If you have Venmo integrated on your website (via PayPal Checkout), the customer can click the Venmo button at checkout, which will prompt them to authorize payment via their Venmo account.
- Venmo Debit/Credit Card: If you accept card payments in-person, a customer could use their Venmo-branded Mastercard or Visa card like any normal card. This transaction wouldn’t go through your Venmo app but through your card processor, so it’s not directly a “Venmo business profile” payment (just mentioning as an aside).
- Payment link: You can generate a payment link or QR code from your Venmo business profile to send to a customer via text/email. When they click it, if on a phone, it opens Venmo to pay you.
In all cases, the funds land in your Venmo balance. The customer experience is much like paying a friend on Venmo, except it’s a business profile so they might see an indicator of Purchase Protection eligibility on their end for that payment.
Q5: Do I need an EIN (Employer ID Number) to use Venmo for Business?
A: Not necessarily. If you operate as a sole proprietor or individual, you can use your SSN/ITIN instead of an EIN. Venmo will ask “Does your business use an SSN or EIN?” during setup. If you have an EIN (for an LLC, corporation, charity, etc.), you should use it and select “Registered business” when creating the profile.
If you don’t have an EIN, select “Individual” and you’ll provide your personal SSN. Venmo supports both scenarios. The key is that they have info for tax reporting. Many very small businesses start without an EIN and that’s fine for Venmo purposes.
Q6: Can I have more than one Venmo Business Profile?
A: No. Each personal Venmo account is limited to one business profile attached. You cannot create multiple business profiles with the same login or person. If you run multiple distinct businesses, this is a limitation – you’d have to either consolidate under one profile or have another person create a separate Venmo account for the second business.
Also, Venmo currently doesn’t allow transferring ownership of a business profile to another person or login, since it’s intrinsically tied to the creator’s personal account. Consider this when setting it up (e.g., if you plan to have a partner manage, that partner might need to be the one to create it under their Venmo).
Q7: How is Venmo Business different from PayPal for Business?
A: The core difference is in scope and features. Venmo Business is an extension of a peer-to-peer app – it’s simple, social, and mobile-only, good for quick payments primarily in the U.S. It has lower fees for in-person/app payments and appeals to users who already use Venmo daily.
PayPal Business is a full-fledged payment processing platform: it works internationally, supports many currencies, and offers advanced tools like e-commerce integrations, invoicing, subscriptions, and POS hardware. PayPal’s fees are higher on average and its interface is more complex (web dashboards, etc.), but it’s more powerful overall.
One analogy: Venmo is like a lightweight tool for small transactions, whereas PayPal is an enterprise tool that can grow with a business. Interestingly, PayPal owns Venmo, and in fact you can even accept Venmo through PayPal’s checkout – but from a user perspective, they remain separate apps and experiences.
If your business is small/local and your customers use Venmo, the Business Profile is a great convenient option. If you plan to sell beyond that (online store with a wide audience, or need to handle customer disputes, etc.), you might lean towards PayPal or use both in parallel.
Conclusion
Venmo Business Profiles provide an accessible, low-friction way for all types of small businesses and entrepreneurs to accept payments. In this article, we covered how to set up a Venmo Business Profile for your company – from the initial account creation to entering your business details and publishing your profile. The process is straightforward and can be completed in minutes, giving you a ready-to-use digital payment channel.
Venmo brings benefits like low transaction fees, a built-in social marketing effect, and a familiar experience beloved by younger customers. It’s especially useful for sole proprietors, local shops, pop-up vendors, freelancers, and new startups that need to collect payments quickly without investing in expensive merchant hardware or software. With features like QR code payments and even the ability to accept contactless cards via your phone, Venmo can serve as a lightweight point-of-sale solution in many scenarios.
However, we also highlighted the limitations: it’s U.S.-only, one-user access, and not geared for high-volume or complex businesses. We compared Venmo to alternatives like PayPal Business (more powerful but higher cost) and Zelle (no fees but fewer business features), to help you weigh your options. In many cases, businesses might use a combination – for example, using Venmo for in-person micro-transactions and PayPal or Stripe for online sales, ensuring all customer bases are covered.
In conclusion, setting up a Venmo Business Profile is a smart move if you want to offer customers an easy way to pay via a platform they already use and you value the speed and simplicity of app-based payments. It’s one of the quickest ways to start accepting money under your business name. Just be mindful of its constraints and maintain good practices (like regular bank transfers and record-keeping) to integrate Venmo into your business smoothly.
With this comprehensive guide, you should be well-equipped to set up a Venmo Business Profile for your company and leverage it effectively. Embrace the convenience and don’t forget to promote that you accept Venmo – you might be surprised how many of your customers will say, “Great, I can pay you on Venmo right now!”